-
Who This Checklist Is For
-
Step 1: Start With the Use Case, Not the Product
-
Step 2: Verify That the Vendor Actually Sells It
-
Step 3: Match the Clinical Technique, Not Just the Spec Sheet
-
Step 4: Calculate Total Cost, Not Quoted Cost
-
Step 5: Run the Regulatory Check
-
Step 6: Confirm Training and Post-Sale Support
-
Step 7: Write Acceptance Criteria Before You Sign
-
Common Mistakes That Still Bite People
Who This Checklist Is For
If you're placing orders for surgical equipment, diagnostic devices, or durable medical equipment — and nobody handed you a real process — this is for you. I've been handling medical device purchasing for a multi-specialty group for seven years. I've documented roughly $47,000 in personal ordering mistakes. This checklist exists because I got tired of learning the hard way.
Seven steps. Each one has a specific checkpoint. Skip any of them and you're gambling with someone else's clinical workflow.
Step 1: Start With the Use Case, Not the Product
"I need a slit lamp" is not a purchase request. It's a guess. I know because I wrote that exact line in 2019 when we opened our second eye clinic location.
A slit lamp is not a monolithic category. Magnification range, slit width variability, illumination type, and whether it supports image capture all vary significantly. We bought a base model with fixed slit width and limited magnification — fine for general screening, useless for the anterior segment work our new ophthalmologist was hired to do. Patients got redirected. We lost roughly two weeks of scheduled imaging. That's $8,400 I'm not getting back.
Same lesson applies to a dental unit. People ask "what is a dental unit?" expecting a one-line answer. It's a chair, a delivery system, a control panel, a water/air supply, and often an integrated imaging mount — and those components have to match the specific procedures your clinic performs. A general dentistry setup and an endodontic setup share a name and almost nothing else.
Checkpoint: Before you look at a single product listing, write one sentence: "This will be used by [who] to do [what] in [where]." If you can't fill that in, you're not ready to buy.
Step 2: Verify That the Vendor Actually Sells It
I assumed "medical supplier" meant "sells all medical equipment." Didn't verify. Turned out the rep who quoted us an electric wheelchair was a specialist in surgical implants who'd been asked to "cover" a territory call.
Here's the rule: brand ≠ category ≠ vendor.
Zimmer Biomet, for example, has a comprehensive orthopedic and dental portfolio — implants, instruments, robotic systems (ROSA), and surgical training. They are not selling you a slit lamp or an electric wheelchair. If a quote comes in for equipment outside a vendor's stated portfolio, ask why. Sometimes it's a legitimate distributor arrangement. Sometimes it's a rep hoping you won't check.
Zimmer Biomet products cover hip, knee, shoulder, and dental implant lines. That's an enormous range. But even within that range, understanding what they actually manufacture versus what comes through a distribution partner changes your warranty terms, your service expectations, and your training access.
Checkpoint: Cross-reference the vendor's official product catalog before you accept any quote. If the item isn't listed, get written confirmation of the distribution arrangement. Verbal reassurance doesn't count.
Step 3: Match the Clinical Technique, Not Just the Spec Sheet
This is the step most people skip. And it's the one that costs the most to get wrong.
An orthopedic surgeon using the Zimmer Biomet reverse shoulder surgical technique isn't just looking for "a shoulder implant." The reverse shoulder approach has specific instrumentation requirements, specific implant design considerations (humeral stem geometry, glenosphere positioning), and specific planning software compatibility. If you order a shoulder system that doesn't support that technique, you haven't saved money — you've bought something the surgeon physically cannot use.
I made a version of this mistake with a total knee order in early 2021. The implant met the surgeon's size requirements but wasn't compatible with the navigation system already installed in our OR. Nobody flagged it until the rep showed up for the case. Lost case day, rescheduled patients, and a very uncomfortable conversation with the surgeon.
Same principle applies across categories. A slit lamp that doesn't integrate with your existing image management system is a partial solution. An electric wheelchair with a fixed seating system when the patient needs tilt-in-space positioning is a return waiting to happen.
Checkpoint: Have the clinician who will use the equipment confirm — in writing — that the specific model is compatible with their technique, workflow, and existing systems. "Close enough" specs are not close enough.
Step 4: Calculate Total Cost, Not Quoted Cost
In September 2022, I approved a $3,200 implant order because the unit price was 18% below our previous supplier. Then the invoice arrived with $840 in freight, a $200 cold-chain handling surcharge, and a note that the sterile packaging required separate disposal. Total delivered cost was actually higher than our original supplier.
Total cost of ownership for medical equipment includes:
- Unit price (obviously)
- Freight and logistics (medical devices often ship under special conditions — temperature control, sterile packaging, oversized freight for equipment like dental units or imaging devices)
- Installation and calibration fees
- Initial clinical training (sometimes bundled, sometimes not — always ask)
- Consumables and disposables for the first 90 days
- Service contract terms and what the warranty actually covers
- Return/replacement conditions if the equipment fails acceptance testing
I still kick myself for not asking about freight terms upfront on that 2022 order. If I'd gotten the shipping schedule in writing before signing, we could have disputed the surcharge instead of eating it.
Checkpoint: Request a written landed-cost breakdown before issuing a purchase order. If the vendor won't provide it, that's information too.
Step 5: Run the Regulatory Check
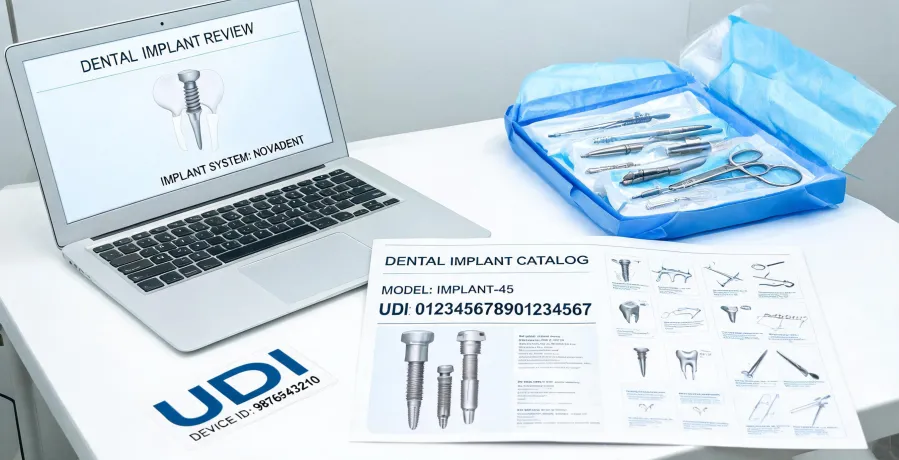
Every piece of medical equipment in the US needs proper regulatory clearance. FDA registration, 510(k) clearance where applicable, unique device identification (UDI) labeling — these aren't optional.
This isn't just a compliance formality. It affects your ability to bill, your liability coverage, and whether the device can legally be used in patient care. I've seen a shipment held at customs because the UDI labeling didn't match the purchase documentation. Three-week delay on a $12,000 order.
Different device categories carry different requirements. A Class I device (like many basic dental instruments) has lighter requirements than a Class II device (like a slit lamp or most implant systems). Know which class your equipment falls into before you order.
Checkpoint: Verify the device's FDA registration status and 510(k) number (if applicable) directly on the FDA database. Don't rely on the vendor's marketing materials.
Step 6: Confirm Training and Post-Sale Support
There's something satisfying about a clean installation where the rep stays for two days, trains the entire clinical team, and leaves a direct line for questions. After two installs where nobody trained anyone, I now make this a contractual condition.
Who trains the staff? How long? Is follow-up training available at 30, 60, 90 days? What's the response time for service calls? Is there a loaner program if the equipment goes down?
For implant systems specifically, training isn't just "how to use the device" — it's "how to use the device with this specific surgical technique." Make sure the training matches the clinical application, not just the product category.
Checkpoint: Get the training plan in writing, including hours, format (on-site vs. virtual), and who's responsible for scheduling. Add a follow-up training clause at 90 days.
Step 7: Write Acceptance Criteria Before You Sign
An acceptance test isn't a formality. It's your last chance to catch problems before you've paid in full and lost leverage.
For each order, define:
- What "correct delivery" looks like (model number, quantity, accessories, documentation)
- Who inspects it (someone who knows the equipment, not just whoever's at the loading dock)
- What tests must pass before payment is released
- What happens if it fails (return shipping, replacement timeline, refund terms)
I once accepted a dental unit delivery without checking the compressor specs. It ran fine for six weeks, then started short-cycling because the compressor couldn't handle four chairs simultaneously. That was a five-week replacement process. The acceptance checklist would have caught it in 20 minutes.
Checkpoint: For implant and instrument orders, require an unboxing verification with photos. Every item, every part number.
Common Mistakes That Still Bite People
Even with a checklist, these keep showing up:
- Ordering from memory instead of documentation. If I remember correctly, I've made this mistake three times. Don't rely on what you think the last order contained.
- Assuming the rep understands your clinical requirements. They understand their product. Your workflow is your responsibility to communicate.
- Skipping the second signature. Every order over a set amount gets a second pair of eyes. We've caught 47 potential errors this way in the past 18 months.
- Not documenting verbal promises. If the rep says "we'll throw in extra training," get it in the quote. Otherwise it doesn't exist.
- Treating rush orders as exempt from the process. They're not. They need more verification, not less.
The checklist takes 20-30 minutes per order. That's a lot less than the days and dollars it takes to fix a mistake after the fact.
An informed buyer asks better questions and makes faster decisions. The vendors who want your repeat business will respect that. The ones who don't — well, you just learned something valuable.

Leave a Reply